Online Blog > Previous Entry 5/31/2020 > 12/15/2020 - Large custom home with walk-out basement in Bonners Ferry > Next Entry 2/28/2021.
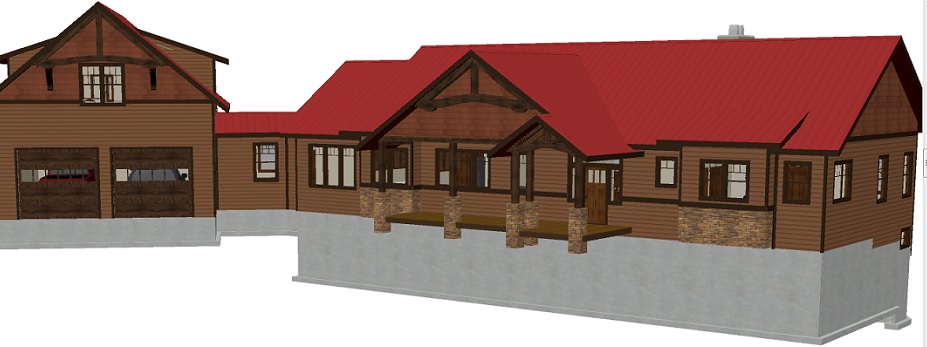
Back in 2015 I met new clients who were planning to retire to Bonners Ferry from out-of-state. After many homes in many states over 40 years of marriage, it was time to settle down and build their dream home. The goal was to accumulate all of their experience from the many homes they had lived in over the decades and incorporate the best and most functional ideas into their last home. They wanted to avoid the undesired features of the previous homes while also accommodating into the design a change of lifestyle as they headed toward retirement. This would include ample laundry facilities and a second kitchen for butchering as well as making chocolates. Chocolate? Sign me up! I actually only vaguely remember designing the home about five years ago now. In 2015 we did what I recommend to a lot of clients - we walked the property, talked about their ideas including all of the future buildings and infrastructure, and then we got to work on a home design using my computer designing software from Chief Architect. A lot of the designing happens over email, some in-person meetings and some phone calls. Often the case is my clients show me some ideas they like, maybe they sketch out a basic floor plan, but then we really work with their building site to take advantage of views, sun exposure, privacy, trees and, in this case, a slope into a wooded wash which makes a full walk-out basement an excellent addition to the square footage. Their property is twenty acres and incorporates several acres of alfalfa field with a grass mix - fairly flat and level. One day they plan to run pigs, sheep, goats or maybe even cows in this excellent pasture. The land then drops into a deep wash and wooded area. Probably half the property is the fields, and the other half is timbered, except that the previous property owner had done some selective logging. Sitting just north of Bonners Ferry and just east of the Moyie River, the homesite has some incredible views of the rugged mountains to the east and west. We definitely wanted to incorporate the sky and the views into the openness of the home. Besides the design in 2015, we started the infrastructure development which included a quarter mile of private driveway, 13' wide of crushed stone on road fabric so that it holds up well to vehicle traffic, and they never lose that rock. Knowing about where the buildings would be, we also installed a water line from the community water main that runs along the highway, and we had Northern Lights Electric Cooperative plow in 2000' of feeder line to a new 400 amp meter pedestal. With a road, water and power, we were now ready to build the next spring. That is common advice I give, and many people exercise it; get the infrastructure in the fall developed, finalize plans over winter and get a spring start on the project (not that we haven't started projects at any time of year - we are able to build year-round up here). So we designed over the winter of 2015-16 what would be the whole building, which also included an attached garage with an apartment upstairs. It was that portion of the building that was actually to be built in 2016 as phase 1 - the apartment over the garage. This would allow the clients to visit their property on vacation and comfortably stay on it. And then, in the future, the fully self-contained apartment above the garage makes for excellent guest quarters or even an Air BnB rental. So, by the spring of 2016, we had already incorporated the phase 1 garage/apartment into a complete custom home design so that in the future we could add on the main home to that building. If you want to read about the phase 1 building of the garage, you can go to our blog from 2016 here with a full view of phase 1 on our garage and shops page. Well, we are now in the future, 2020, and after checking and making final changes to the design in late 2019, we scheduled the home to start in the spring of 2020. We also talked about costs and budgets, and even as a result reduced the square footage somewhat from the original plan. A lot of things factor into total project cost, but a significant determinant is square footage. The final plan is just over 2500 SQF on the main level including in the portion of the house that is over a new crawlspace and that attaches to the garage from 2016. Then, the remainder of the main level, about 2200 SQF is over a full 9' ceiling'd walk-out basement with an office, bedroom, bathroom, recreation room, storage and mechanicals and a full commercial/butcher kitchen (2200 SQF then downstairs). Here is a rendering from our software of the intended home including stone work and the correct paint colors and timbers, roof and rock colors and even the concrete elevations:
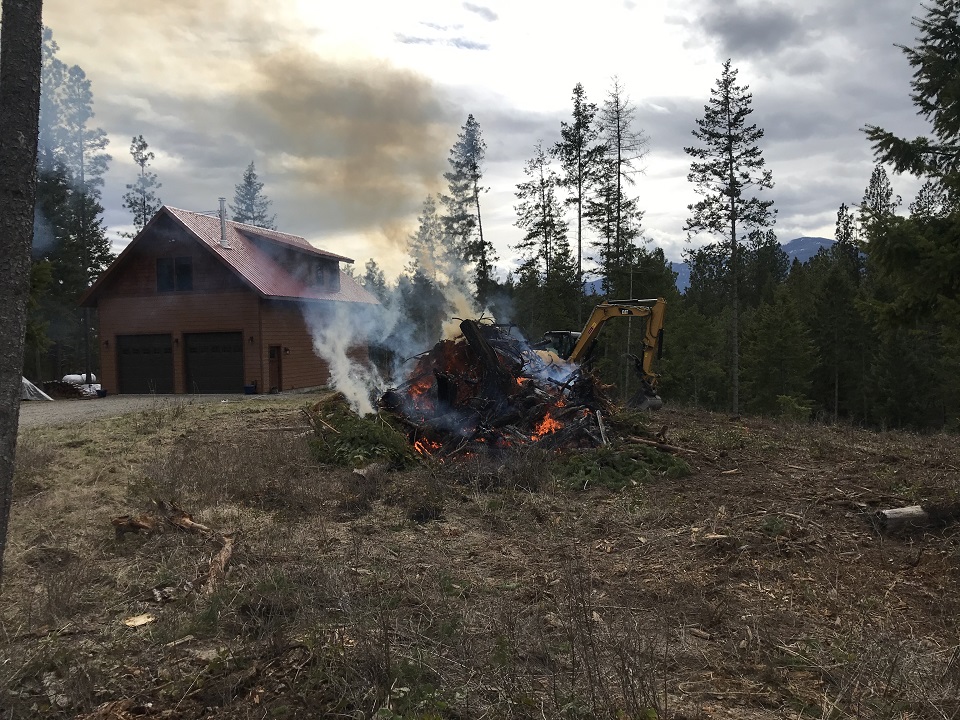
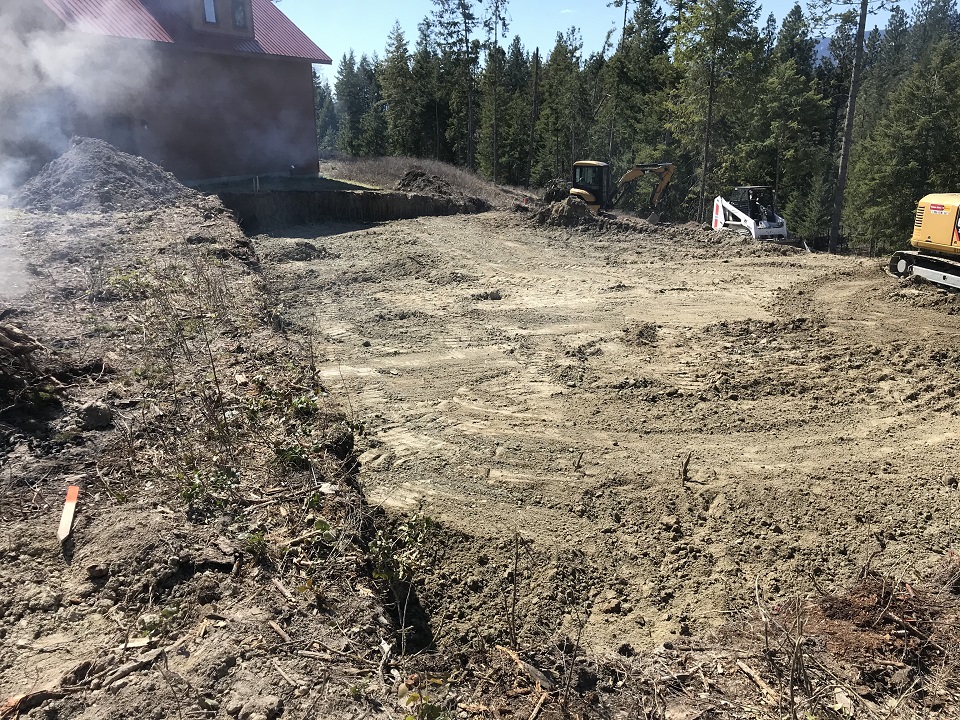
In the below photo you can see the garage/apartment from the 2016 build. Our first step for the home development is to clear the trees and brush, and the debris we just burn on site. Basically for a few days as we dig we get to smell fresh wood smoke:
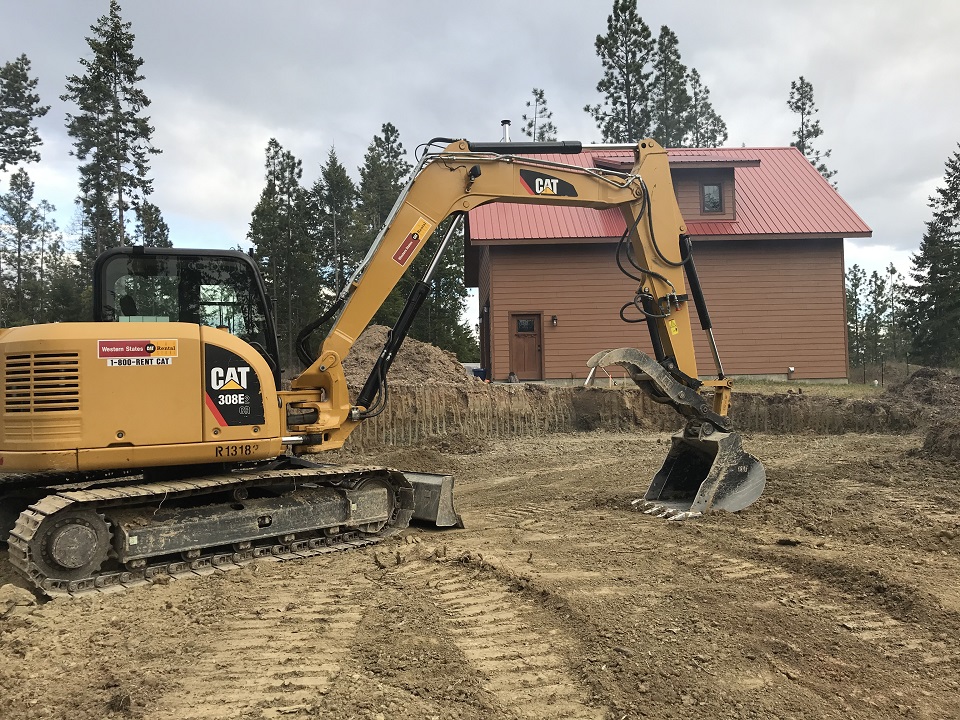
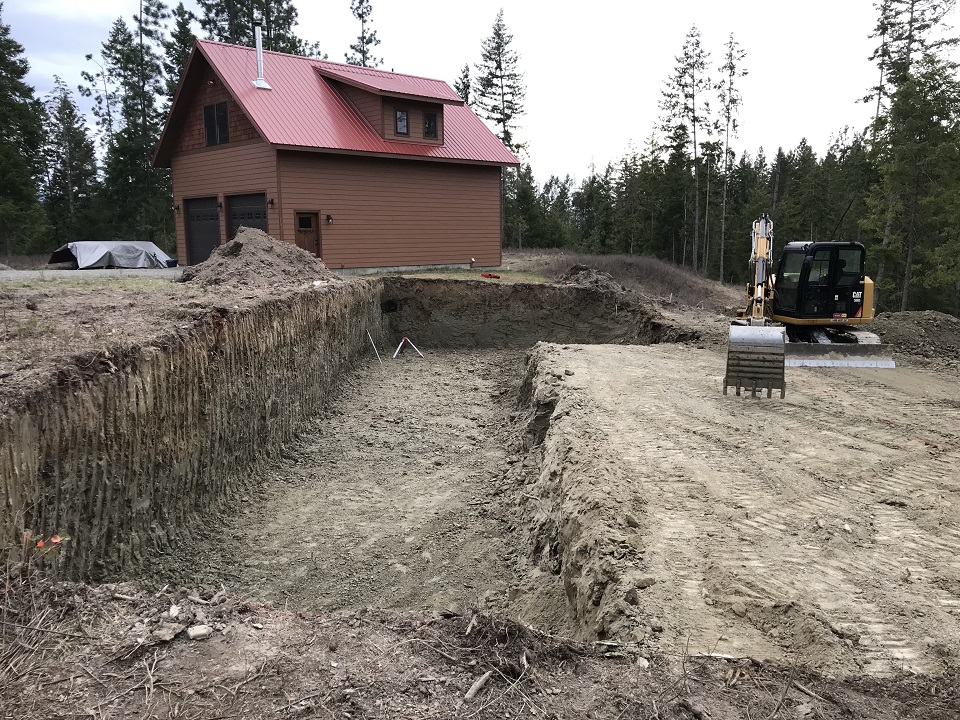
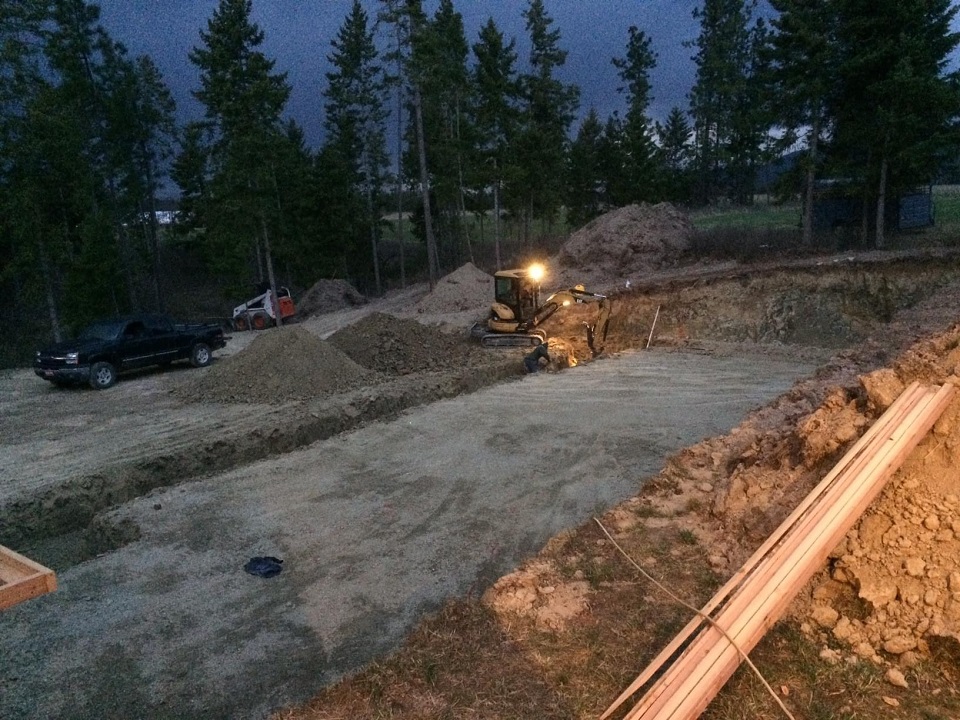
We run our own crew of three or four men plus subcontractors for particular trades. One of the things we do with our own crew is the excavation. We own a Kubota utility tractor, a Bobcat skidsteer, a CAT mini excavator, and a dump trailer. This job being a bigger job, we rented an excavator from Western States CAT. In this case, load limits from spring break-up were on, so we couldn't move really heavy equipment, so we opted for a 20,000 lb. CAT308. This is an excellent overall machine and is very efficient for digging a basement foundation. We only needed it on site for a week. We use a building transit to stake basic angles and lines for the dig, needing to dig out enough room to work completely around the basement walls. Since the dig is over 10' deep, we tackled it in two lifts, first creating a level working area 3-4' deep and then finishing the remaining 6'. This created a lot of fill (clay soils up on this site). We are careful to keep the top soil separated so that we can put it back on top when we are done, but the basement displacement gave the clients a pleasant surprise - they have much more level yard area on the walk-out side of the house than they had anticipated.
You can see an orange topped stake in the photo below - it denotes a future building corner:
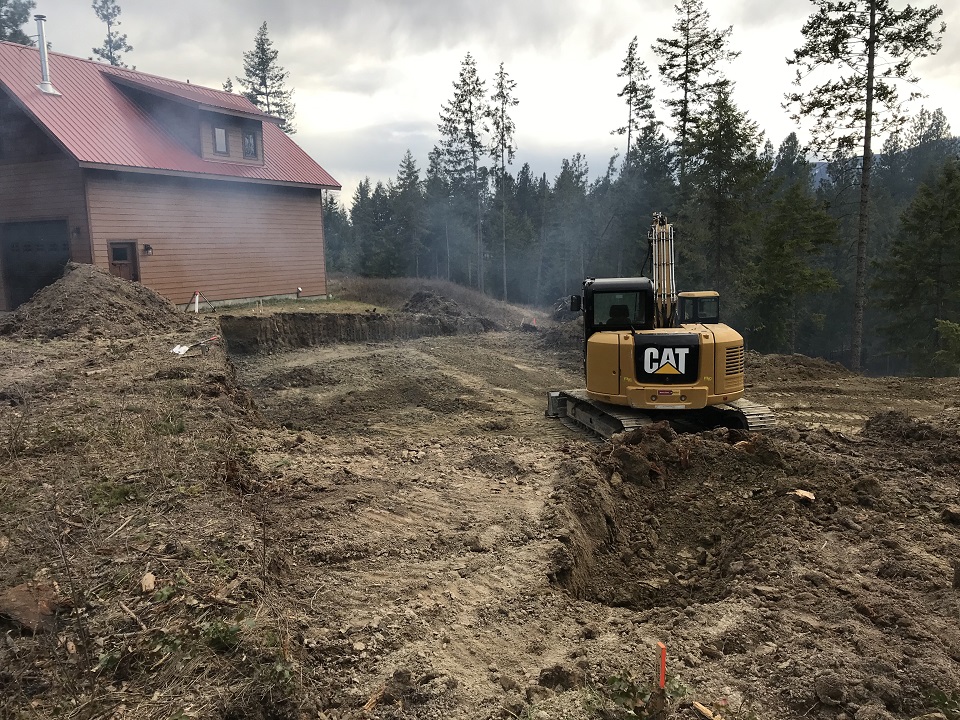
In the photo below, you can see that we are moving the fill material to begin leveling an area downslope of the dig toward the wash - and out of the foundation footprint. You can also see the smoke from our still smoldering fire:
In the below photo we have started the final lift, digging out the remaining 6' to below the basement floor. This is where the contractor has to be accurate! Lasers help, and good math:
And now that final lift is done. We are down to the bottom of the footers for the basement foundation. The basement floor slab will be poured higher than this level on about 10" of compacted gravel after we pour the footers and walls and place the ground plumbing. The CAT308 blade does a great job flattening out the clay, making this site very walk-able - unless it rains and the clay sticks to your boot! Which it did often on this part of the job - in fact, it rained a lot this year in June:
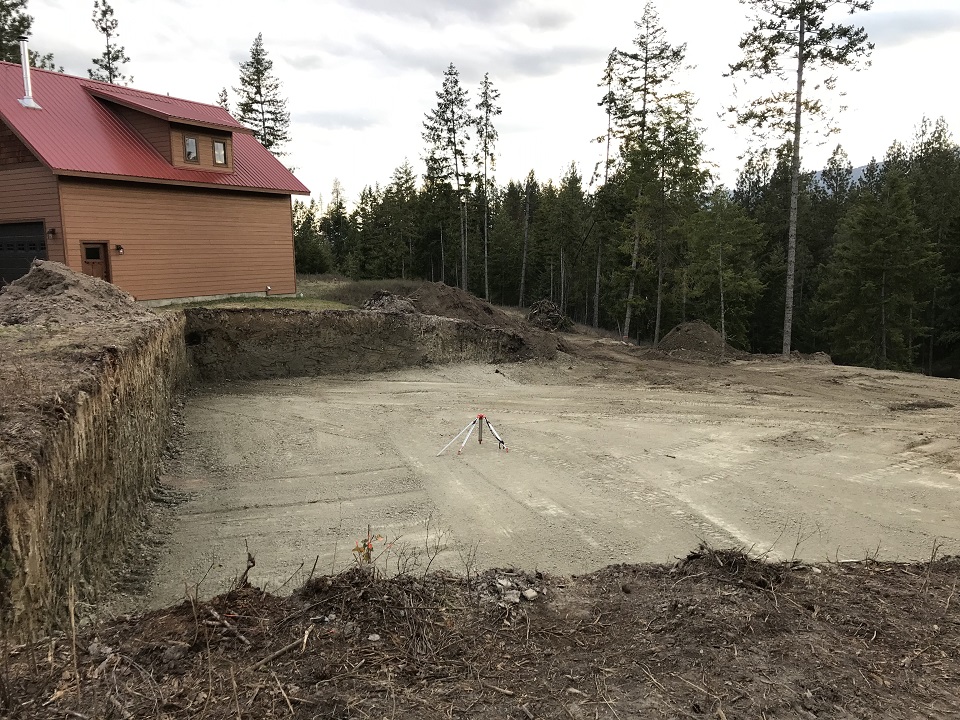
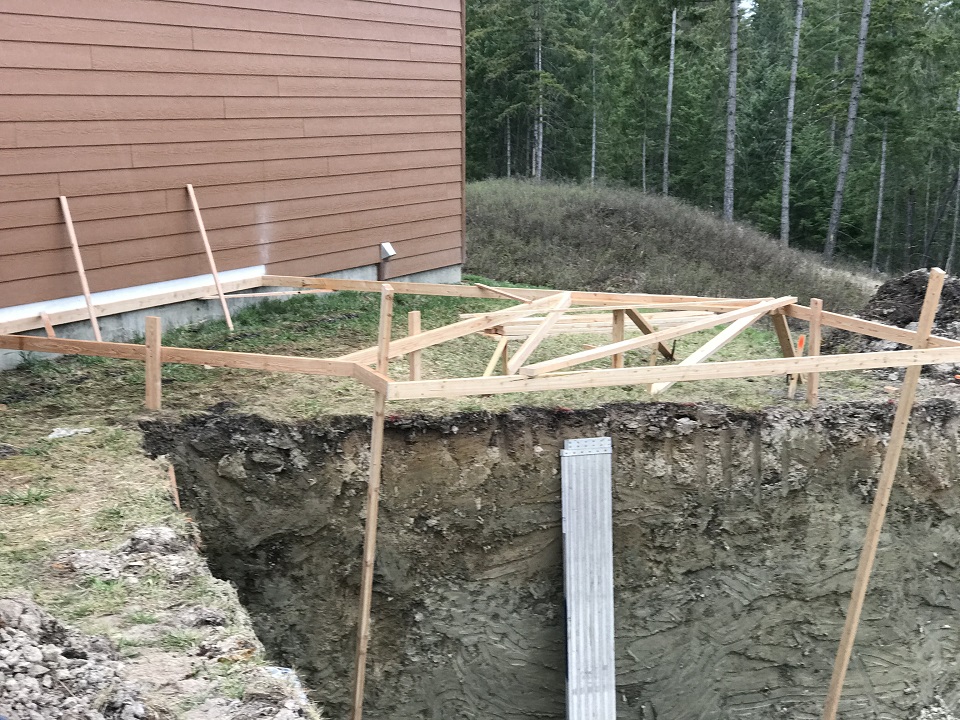
We still have to dig the footers in a little bit, especially on the daylight side since we need the bottom of the footers to be about 32" below the final grade to prevent frost heave. Since we need to do a little more digging, and we will need it to layout the footers, we built a simple frame that represents the exact positioning of the part of the house that will connect to the garage. With some math and some long tape measures, we are going to use this little frame to layout the entire rest of the house. The angles and positioning matter precisely. After we pour the basement, we will come back to this little frame location and construct a crawlspace foundation for the rest of this home that makes the connection between the basement portion and the garage:
Our rental time was up on the CAT 308, but digging the footers is an excellent job for our mini excavator and our dump trailer. We worked late:
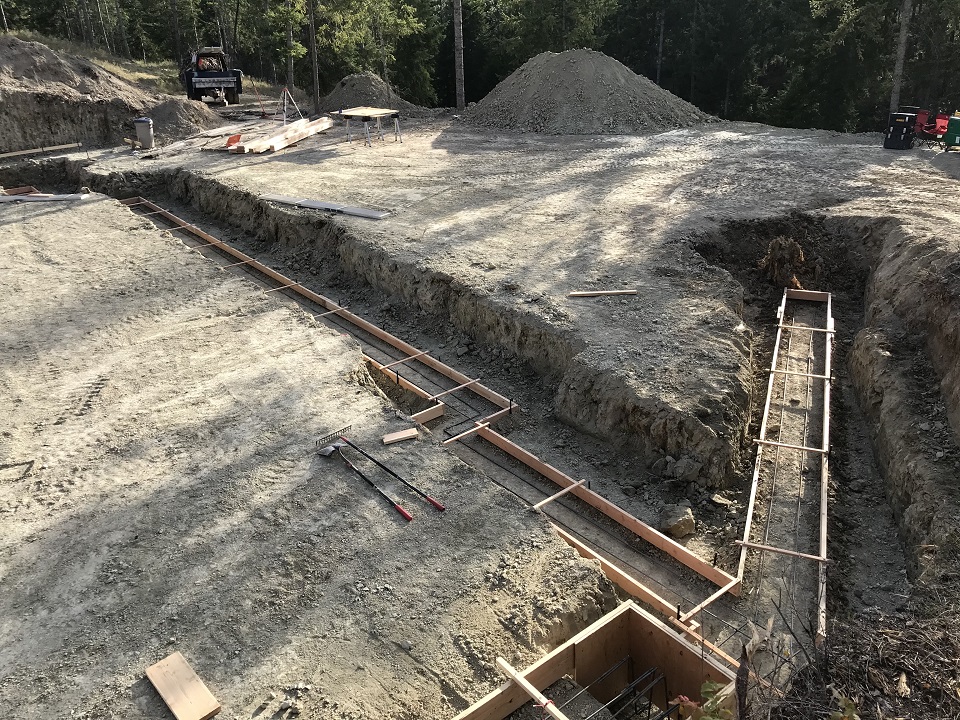
So far all we have done is dig, so now it is time to form up for our rebar reinforced concrete footers upon which the stem walls, basement walls and retaining walls will be poured:
Since this is a concrete basement wall with a 9' 6" height, the rebar schedule is heavy for the walls - 5/8" (#5) rebar "doglegs" connect the walls vertically to the footer every 16", and then we have a horizontal 1/2" (#4) rebar course every 16" up the height of the walls. Basically an engineer can work this out for you based on loading and soil types, and there are some handly tables available online for general guidelines:
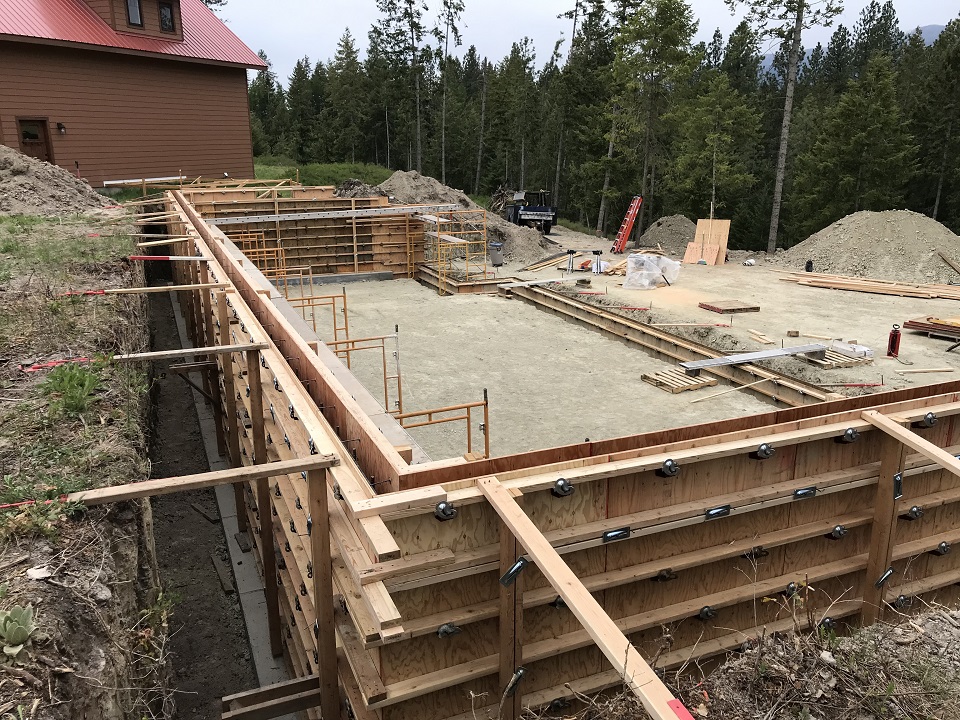
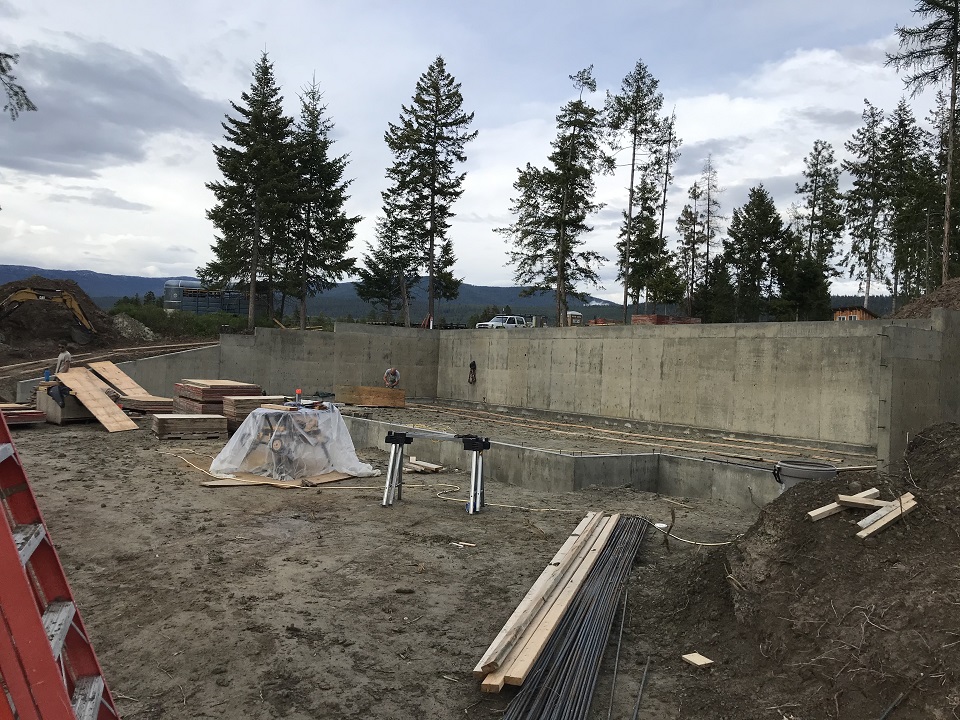
Once the walls are poured and set for several days, we strip and clean our forms. It is our own four man crew that does all of the concrete. Frankly, I enjoy it, and we are incredibly accurate which makes all of the framing that comes later that much easier. Hopefully you are using a concrete contractor, like us, who puts the sleeves for all future plumbing and electrical accurately into these poured walls and who installs for your main electrical panel an Ufer ground.
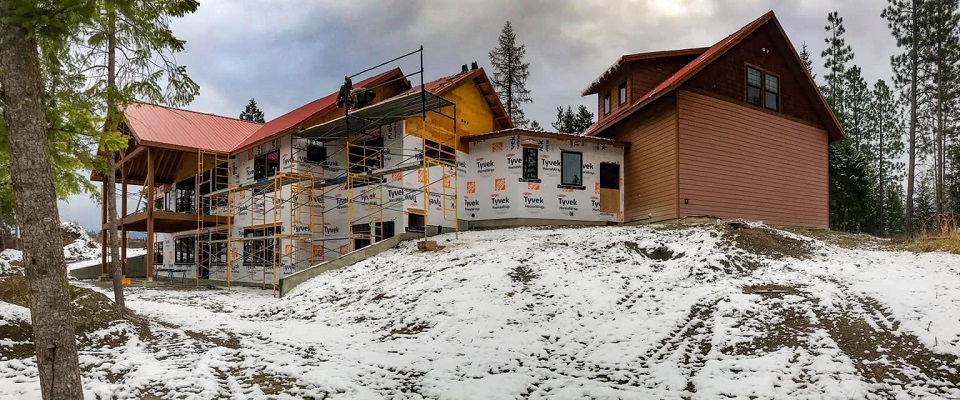
Next up we will have our first subcontractor come to the job - our plumber, who we will dig some trenches for so that he can install the plumbing that will be buried below the ground floor slab but accommodate all of the fixtures on the ground floor and the drops from the floor above. Years ago in the original phase 1, we set the septic tank to not only work for that garage/apartment but to also be deep enough for a gravity flow from this future basement. I used the laser, and we nailed it. This is the importance of careful planning to incorporate all future growth of your property and accuracy to implement the plan. I'll blog again here soon to walk you through the slab and framing stages. Right now as I write, we have a roof on, we are siding, and the drywallers are just getting ready to hang rock. Here is a sneak-peek as we were finishing the roof a month or so ago:
|