Online Blog > Previous Entry 5/03/2016 > 5/11/2016 - Footer and stem wall concrete construction > Next Entry 5/17/2016
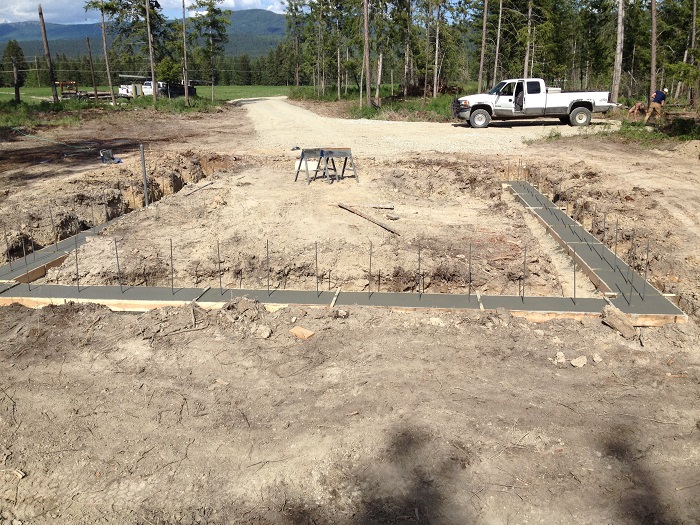
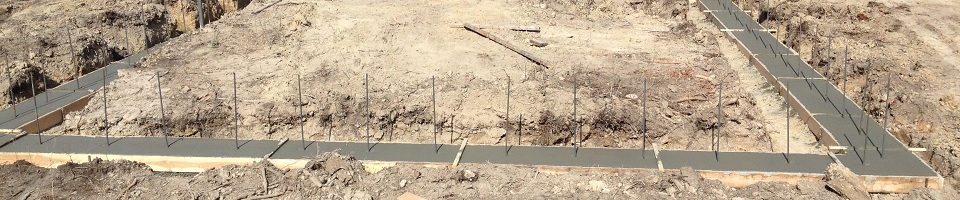
The site is cleared, the excavation was completed with our own equipment, and now we have set up and have poured the concrete footers and stem wall for this Bonners Ferry garage/apartment. First in line was the concrete footer. After evaluating the clay soils and considering the second floor apartment, we opted for a 20" wide footer that was 8" tall. The goal is to place the bottom of our footers about 30" below grade, which is deep enough to be well below the 50 year average depth of frost, preventing the building literally from heaving when the ground freezes. If your footers were too shallow, then the freeze would get in under the footer, and freezing soils expand. We have seen as much as 1" higher grade in winter wround buildings just from the frost heave effect. If the heave did not happen uniformly, which it never does because southern exposures heave less than the north side of a building for example, then there would be strains and stresses on the concrete and the framed structure. The solution therefore is to get that foundation well below the levels of soil freeze. The footer is formed with 2x6 wood forms, and then 2 courses of horizontal, 1/2" steel rebar are placed within the forms. The excavation was leveled using a laser, and we square up the form work. We have very tight tolerances, even for our concrete construction. Our levels on a building, no matter the size, are always built to within 1/8" from the footer up, since if you start level way down at the footer, it is that much easier to keep it level as you add the stem wall and then the floor or other framing. So, once the rebar is placed, we determine square and stake the corners of the form work, and then we string line the lengths of it so that the forms can be staked in straight lines. We then join the outside and inside form boards together about every 5' with spreader cleats, and then we go around with the transit and set the level grade of the form work on top of the relatively level excavation. We poured the concrete right off of the tailgate of the ready-mix truck, since the site has good access, and we screed with a 2x4, striking off the concrete to be level with the top of the footer forms. As we pour, we lift the horizontal rebar so that it is in the middle of the vertical depth of the footers. Before we poured, we already accounted for several mechanical tasks. For one, we embed a schedule 40 gray PVC conduit into the footer, that will come up through the stem wall and land in the correct spot in the future stud bay where the main electrical panel will be placed. This ensures that we don't have to place ugly mechanical conduits on the outside of a building later to bring the electrical service entrance into the building. The main panel should also be grounded to the horizontal rebar in the footers, according to the Idaho codes (called an Ufer ground - Ufer is the name of the engineer who designed concrete encased grounding for the US military). In order to accomplish the grounding, we use an extended rebar dogleg that has a horizontal portion tied to the rebar in the footer using wire rebar ties. This continuous piece of rebar then rises vertically through the future stem wall and is tall enough to extend into the future stud bay of the main electrical panel, to which it will be connected via a copper grounding wire and suitable clamp. We also account for any other electrical conduit for switches or circuits to other buildings, wells, or other electrical needs, before we pour footers, so that we encase that conduit in the concrete, and before we pour is the time to bring water lines into the building, usually well under the footer, since we bury our water lines 4' below grade. Usually all we do at the time of the foundations is place a sleeve under the footer to bring the water line in later, the sleeve consisting of a 3" schedule 40 type pipe. After we pour the footers, while the concrete is still very wet, we place rebar doglegs (shaped like an L, with at least a 6" horizontal portion) at least 24" on center (18" in some municipalities, based on their building codes) around the entire foundation. These rebar doglegs are tall enough to come within 6" of the top of the future concrete stem wall (which is the building code requirement), and they act to tie the stem wall to the footer and give it sheer resistance so that it can not be pushed off the footer by sheer forces like backfill. These doglegs are placed in the center of the footer, based both on its depth and width. When we pour footers, we use a 5 sack concrete design that is targeted to achieve a 3000 PSI strength of the concrete after curing. The number of sacks refers to the number of 94 pound bags of portland cement in each yard of the ready mix concrete. When a lot of people think of concrete, they may refer to it as cement. But, in reality, cement is one of the ingredients in concrete, and it happens to be the ingredient that causes concrete ingredients to interlock and harden. The other ingredients in concrete are water, sand and aggregate (rock):
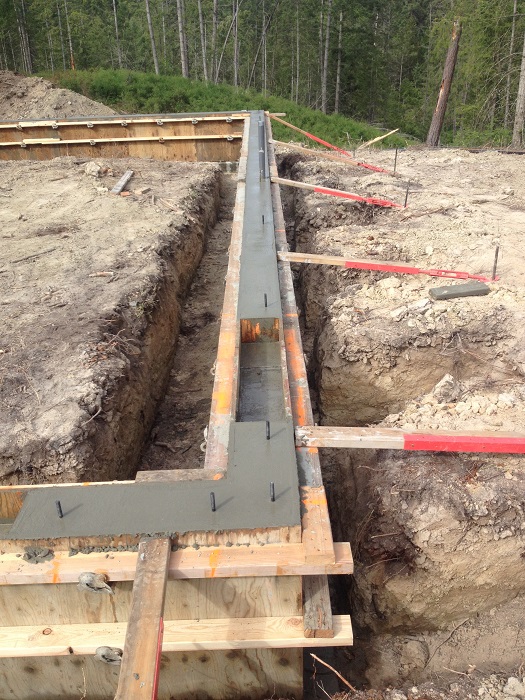
The very next morning after the footer pour, we arrive to strip the footer form work and layout and snap lines on the footer for the concrete stem wall. We then install steel base clips to the footer using concrete nails. That is actually why we are on it the very next morning, so that we can hand drive those nails, because if we wait even a day or two, that footer concrete is curing and getting progressively harder, and harder concrete usually means we would have to use a powdered charge tool to drive fasteners into the footer. The typical stem wall is 32" tall and 8" wide, though there are a number
of variations depending on building type and site grading relative to the
building. We use 3/4" plywood forms sprayed with a form release oil to form
the walls. Two courses of horizontal rebar are placed in the typical 32"
tall stem wall, at about 13" above the footer and 25" above the footer. We
then block out an opening for the building drain related to the plumbing
system to be installed later, and we add necessary plumbing for drains
coming down through the walls in garage construction. The concrete we use for the walls is a 5 1/2 cement sack mix designed to achieve a 3500 PSI strength when fully cured. All of the exterior concrete we use is also air entrained, which gives the concrete the ability to be wet, and for a freeze not to cause scaling of the concrete as the water in the concrete expands in the freezing process.
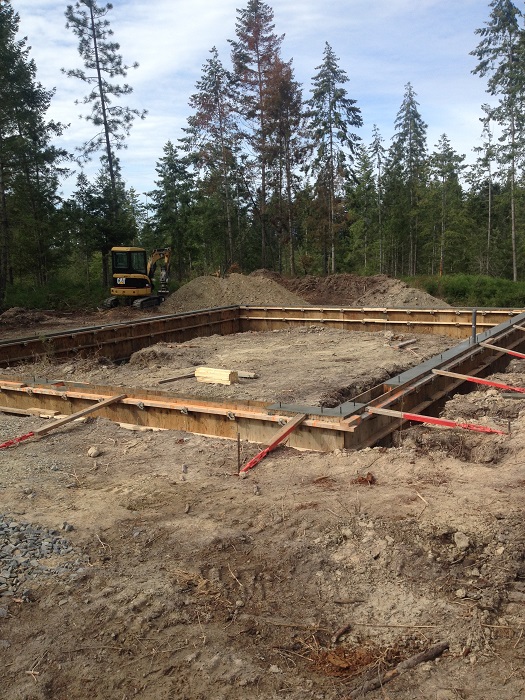
There are tremendous pressures in wet concrete, and to keep the form walls from blowing out, the inside forms are connected to the outside forms by steel snap ties and are tightened to the form work using 2x4's and wedges or Jahn A brackets (which is what we use). The forms are leveled (using a laser, we attach the forms to the base clips with screws, and in some cases we may use a shim or two), lined for straightness and braced with the red turnbuckles you see in the photos. On our stem walls, we typically achieve a very high tolerance for accuracy of the concrete construction. On this project, the top of our stem wall is within level by 1/8", and it was within square by 1/8" as well, though we would generally be satisfied with 1/4" in concrete on the squaring.
|