Online Blog > Previous Entry 3/15/2015 > 4/10/2015 - Concrete Foundation Construction - footers, stem walls and slabs > Next Entry 5/1/2015
For the past couple of weeks since excavation on a shop in Clark Fork, we have formed and poured footers, a stem wall and have prepped for the slab. We opted for 20" wide footers on this shop to spread the load over a good size amount of ground. At Scott Herndon Homes, we do our own concrete construction mainly
because we enjoy doing the work, but also because we are later going to do
the framing, and this causes us to pay attention to particular details that
a concrete subcontractor may ignore (like J bolt placement conflicting with
wall studs or joists). We also have a very high level of precision in our
concrete placement and are not willing to have it go awry even past 1/4".
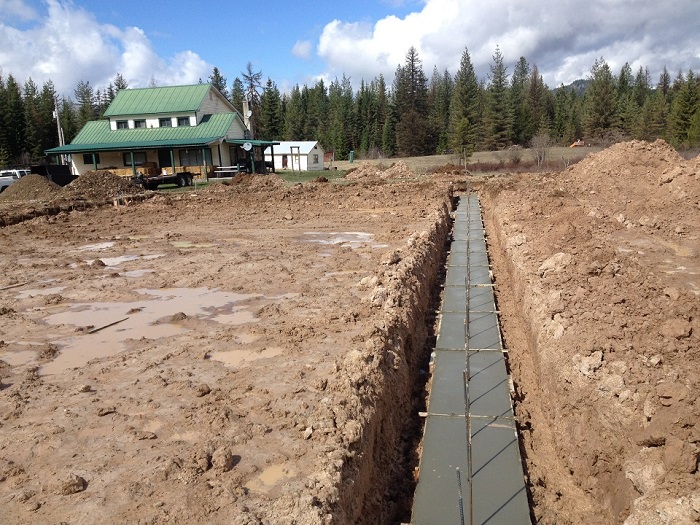
The stem wall is tied to the footer via 1/2" rebar doglegs which are spaced at 2' on center. Some municipalities call for 18" centered spacing. The rebar needs to come within 6" of the top of the stem wall when it is completed.
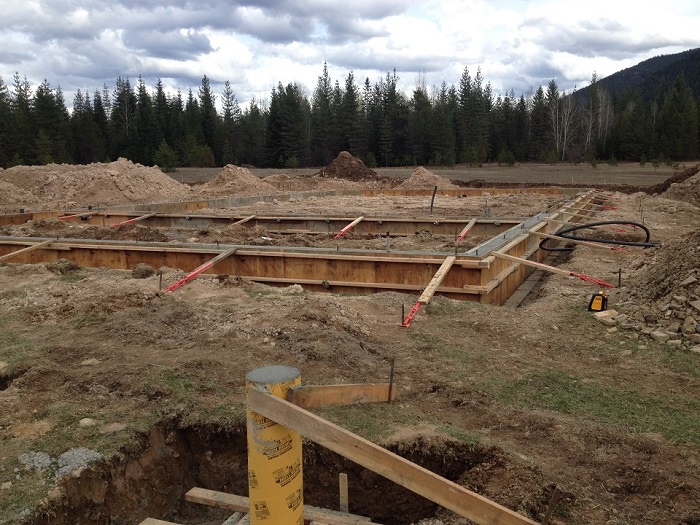
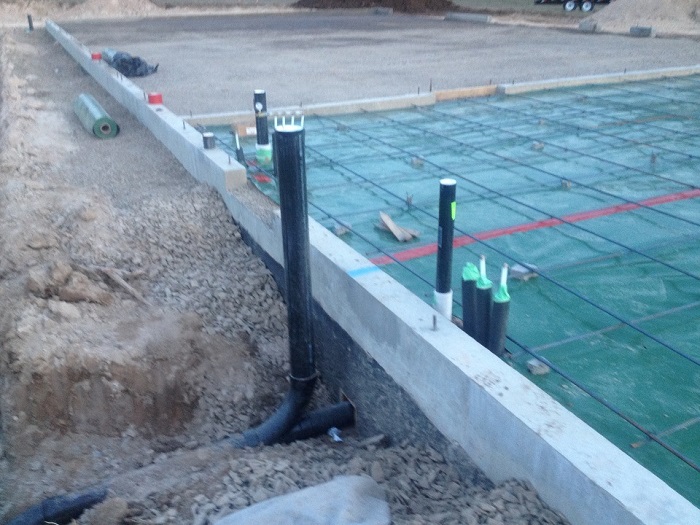
Next comes the stem wall form and pour. This particular shop is getting a 32" stem wall. We align the walls with turnbuckles, giving us bracing and precise adjustment and are pleased with our common achievement of stem wall level within 1/8" and square within 1/4" or less. We use a horizontal course of 2x4 near the top of the wall to give us straight wall tops. J bolts are placed at least every 6' of the wall and within 6" of the ends of the treated plates that will later be installed as the bottom wall plates (or sill plates for crawl space foundations). We always preplan our plate stock and place J bolts accordingly, even taking the time to ensure they are not placed so as to conflict with joists or wall studs later:
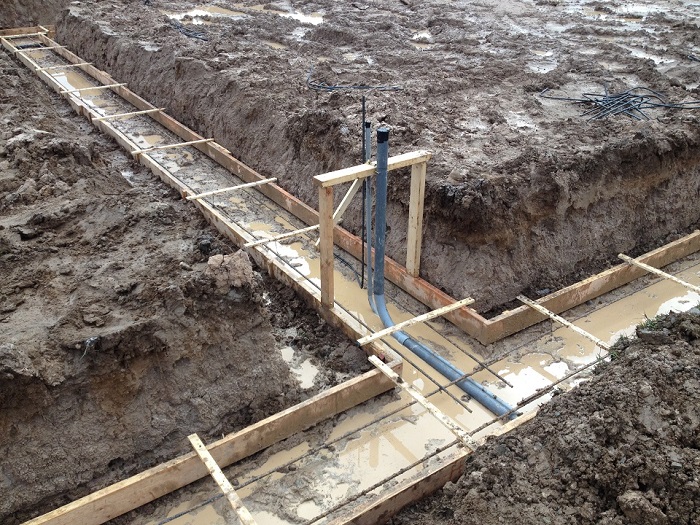
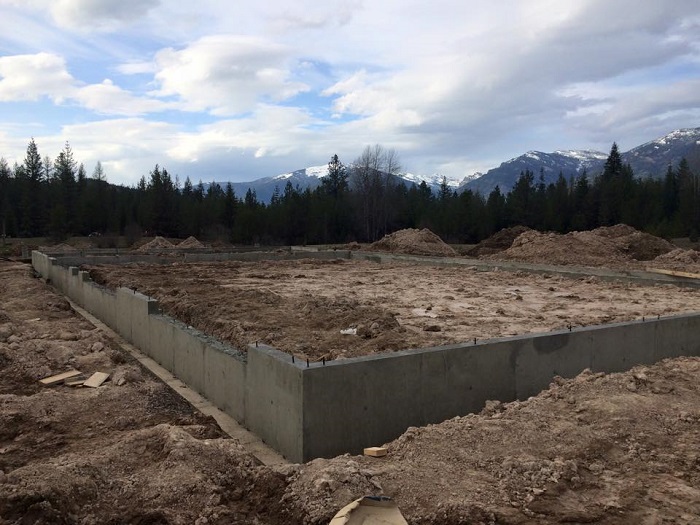
Finally, we remove the forms, and we will paint asphalt emulsion onto the outside of the wall as a damp proofer, as well as we add a 4" perforated drain pipe at the bottom of the footer (a french drain)(by the way - the perforations in the pipe face the 4:00 and 8:00 positions - facing down), covered by washed drain rock and filter fabric to keep out the fines. On most sites, we run this to daylight, or it can be run to a dry well on a flat site. You can see in the photo that we have blocked out for the garage doors - this allows us to pour a clean slab right out the doorway, which is tied to the wall via the vertical rebar doglegs.
Finally, we do the slab preparation. The main points to which we pay
attention are vibration compacting our rock subbase below the slab in about
4 to 6 inch lifts. This ensures we have a solid base on which to place
concrete - one that will not settle later and cause the concrete to have
voids under it. Since rock consolidates well with a plate compactor and some
water, that is the tool of choice. A rammer (or jumping jack) is another
type of compactor for use on soils that do not consolidate well and need a
shear force applied. In the photo can be seen the rough water supply plumbing and drains, as well as the building drain outside of the foundation ready to enter the sewer (which technically begins 2' outside of the foundation). You can also see the asphalt emulsion on the foundation and the washed drain rock.
|