Online Blog > 08/10/2013 - Sandpoint Custom Home Builder designs and Builds new custom home in Sagle > Next Entry 09/25/2013
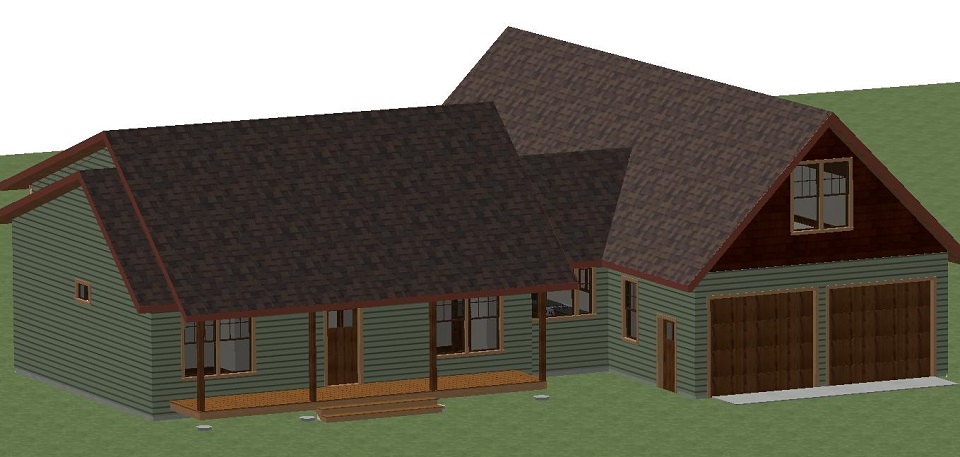
This summer, our major project is the building of a custom home for a homeowner in Sagle, ID. This homeowner called us late last summer, and we then began the process of looking at their land and looking at design ideas for their new home. They brought us a house plan from the internet, but it had some design deficiencies that were not best suited to our climate and winter sun angles. Also, there was a limited amount of dining space. So, we used our home design software and expertise as a builder to develop a home plan that suited their goals. An interesting and challenging part of the design process is to design a home, and then price it out and see if it fits the budget. After the initial design and pricing of this home, we needed to cut about $ 50,000 from the estimated costs to meet the overall budget goal. Our experience as a builder allowed us to make some basic engineering and design and finish changes that only slightly altered the home plan but retained the overall design, and we found the required $ 50,000 in savings. Here is a rendering of how this home will look when completed. (Another great aspect of our software is that we can apply actual colors to the home as well, which our clients find extremely helpful to making finish selections):
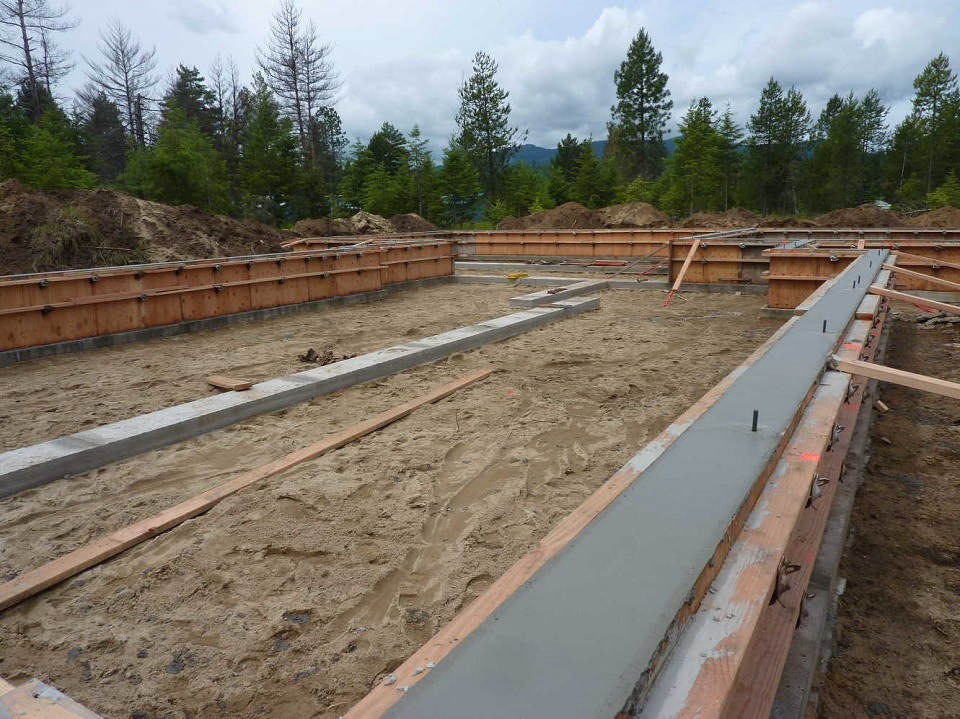
In June, we broke ground for this new home. At Scott Herndon Homes, we prefer to do our own foundation work rather than using subcontractors. Our goal is to get the foundation within square by 1/4" or less and within level by the same standard. That makes the rest of the construction process go so much more smoothly. Our standards on the actual framing of the house are 1/8" or less. The reason we can't achieve perfection itself mostly has to do with the fact that we are working with wood and concrete. Those mediums themselves are not perfect. This stem wall was typical of our projects - its 293 lineal feet were level within 1/8 of an inch. Here is the completed foundation:
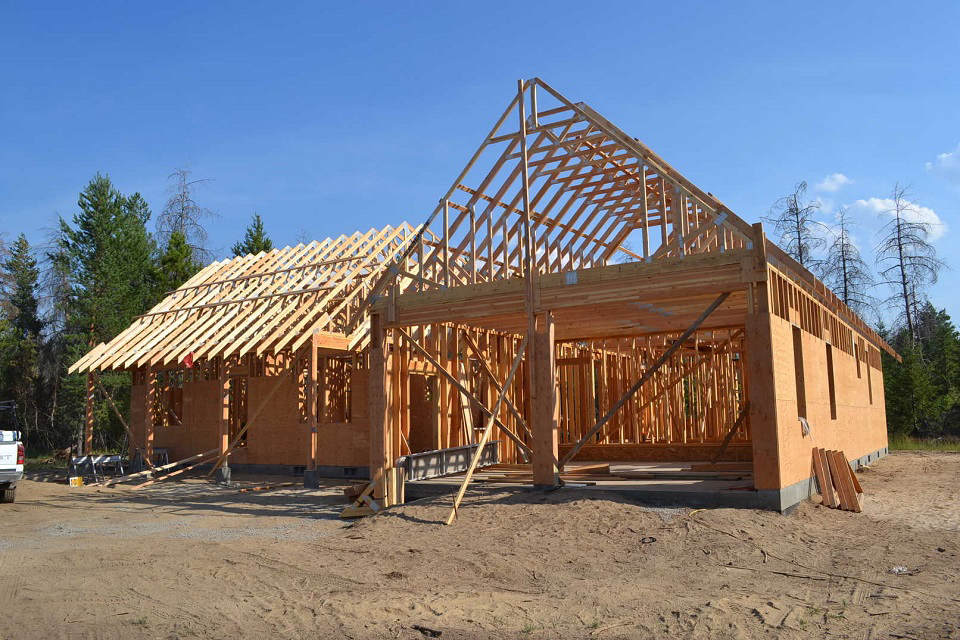
On this home, we are using BCI I joists and a 1 1/8" plywood subfloor over a crawlspace. The extra thick subfloor is because we will be pouring 1 1/2" of Gypcrete over the subfloor to bury an effective, in-floor hydronic heating system. The BCI floor system is designed to give us a 4 star rated subfloor, the highest rating for deflection, with a deflection rating of L/960, almost 3 times the building code minimum for stiffness. This will give the widest range of options for finish flooring, including natural stone, which requires a subfloor deflection not less than L/720. Here is a recent picture of the ongoing framing progress:
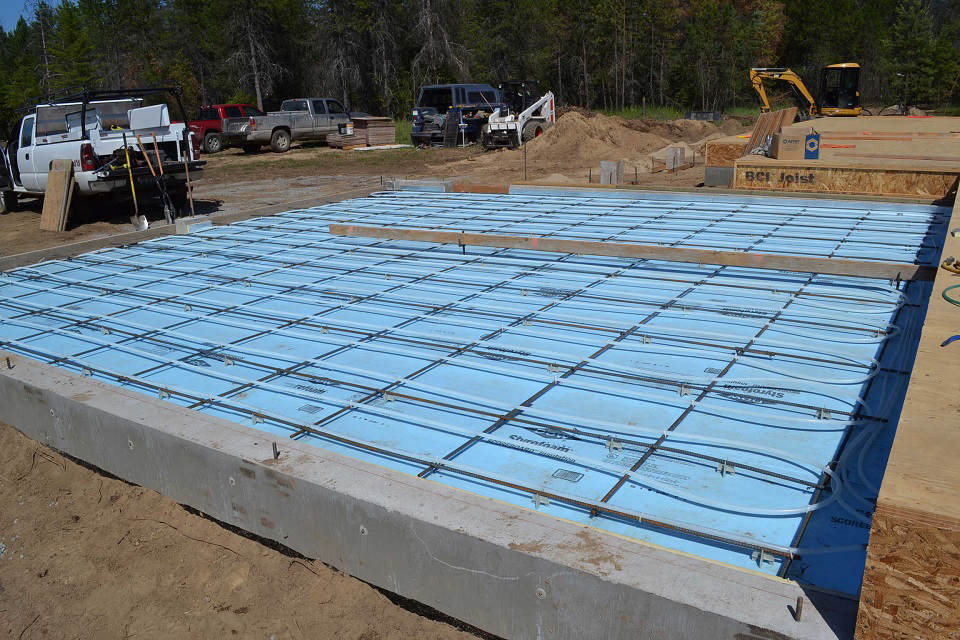
Even the attached garage received an in-floor hydronic heat system. This was accomplished in the following manner. Upon backfill of the garage stem wall, we carefully compact clean 1/2" crushed stone. We screed that to level (with a slope out toward the garage roll-up doors), then we apply a 6 mm polyethylene vapor barrier. On top of that we installed 2" Dow foam board as insulation/thermal break to prevent the ground from acting as a heat sink and ruining the hydronic heating efficiency. We used a 1/2" rebar grid on 2' centers to give strength to the 4" concrete slab, and the rebar forms a grid upon which we attach the 1/2" PEX barrier A tubing. It is also critical to provide a thermal break between the slab and the concrete foundation stem wall. We accomplished this by using 1" of foil faced foam between the slab pour and the stem wall. 1" foil faced foam gives us the highest R value in the smallest width possible with foam insulation. Following is a picture of the final preparation for the actual concrete pour:
|